Back in April I devoted a post to trying to break a boxer engine myth by showing the relative ease of a routine valve adjustment. At the end of that post I commented about flushing the brake system in the coming weeks. I intended on doing this post sooner but I've been fighting a virus with a persistent cough for the past month. Friday I finally went to the doctor at the strong urging of my wife Amber. The prescribed antibiotic seems to be doing its work. I feel somewhat better. I wasn't aware of the general state of crumminess that had overtaken me.
The weather was nice yesterday. It was the first summer-like day of the year. Sunny and about 85 F. A perfect day to go riding but I thought I should get the much needed replacement of the brake fluid done.
I've decided not to go step-by-step through this process for two reasons. Firstly, it might be boring but the big reason is I want to avoid any liability issues. The brake system is obviously an important part to the safe operation of the motorcycle, consequently, care should be used to make sure no air gets into the brake lines and no leaks are evident when done. I used a comprehensive writeup available online on the
BMW Motorcycle Owners Association forum by a member Semper Fi. If you're a member and you log in you'll also see his photos.
But this post is not about BMW stuff. As with the valve adjustment post, I'd like to encourage you to try flushing your brake system yourself no matter what brand you ride. The tech support post by Semper Fi is only mentioned to show that once you find a good source for step-by-step instructions, it's similar to finding a good recipe for brownies. It's hard to go wrong when you follow the recipe. Okay, maybe some surprises can pop up but trial and error does wonders for gaining experience. As I mentioned above, ingesting air into the brake system is the biggest threat and you'll know if it happens before you go for a test ride. More about that in a minute.

This is as close as it gets to a hospital setting in our garage. When I looked at this photo it seemed sort of medicinal with the vacuum gauge and the old t-shirt spread out. The t-shirt is protecting the painted surfaces from an accidental spill of the brake fluid which is very bad for paint. The vacuum gauge (
Mityvac) is used to draw the old fluid out of the reservoirs and to bleed the brake system. The setup above is the first step which is to draw the old fluid from the front brake reservoir.
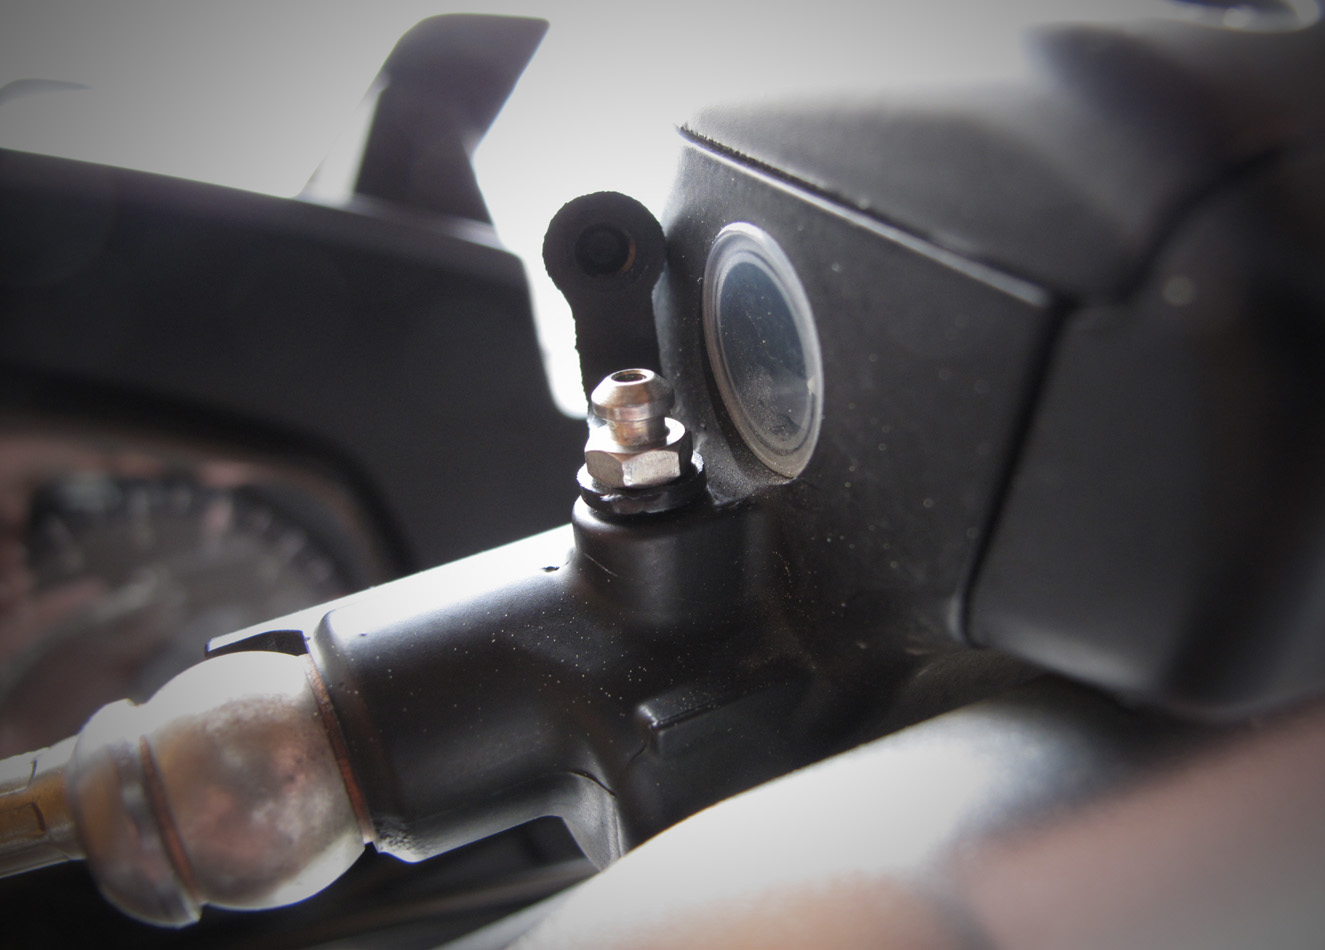
Here is the the bleed nipple on the front brake reservoir. This is conveniently used in the process to replace the fluid in the reservoir.
Brake fluid is not suppose to look like your favorite iced tea on a hot summer afternoon. Pop open one or both of your reservoirs and if it looks like this and it's been a while since it's been changed then this project should make it to your list of things to do. Good brake fluid is clear.
The brake system works by hydraulics. The fluid doesn't compress much so when we pull the brake lever the piston at the lever forces the fluid down the line to compress the pistons in the calipers on the wheel(s). Over time however, a couple of things happen. One is that air can get into the system, either by absorption directly into the brake fluid or more commonly by absorption of water, which contains air. This makes the fluid turn dark and the brakes feel a little squishy. As a rule of thumb the brake fluid should be checked once a year at the very minimum. The fluid level should be checked more often.

This photo shows the old nasty fluid has been flushed and replaced with new. One way to do this is to use a small syringe or turkey baster to pull out the old fluid. Always leave a small amount in the bottom of the reservoir that covers the hole where the fluid goes to the brake line. This keeps away the dreaded threat of inducing air into the system. After adding new fluid, then it's a repeated process of drawing out and replacing most of the contents of the reservoir through the bleed nipple until the fluid looks completely new.

After the reservoir has been flushed it's time to flush the line between the reservoir and the calipers on the wheels. I removed each of the two front calipers and spread the brake pads apart being careful to make sure the fluid in the reservoir didn't overflow from the back up of fluid. Then it's the same procedure as with flushing the reservoir. It's a repeated process of drawing out the fluid at the caliper with the vacuum gauge and replacing it with new in the reservoir until the fluid being drawn is clear.
When that's done the calipers are reinstalled and the brake lever is pumped, while keeping an eye on the reservoir level, until the pads make contact again with the rotors. At this point it's time to see if any air has made its way into the system by bleeding the brakes at each caliper. I won't go through that step but the photo above shows the setup I used for bleeding the front.
This is how the fluid should look as it's coming out the bleed nipple at the caliper during the bleed process. No air bubbles and clear fluid. This is where we make sure things are right well before the test ride.
When the front brakes are done the same process is used on the rear. I thought the photo above of the rear reservoir shows the somewhat dramatic difference between old and new fluid.
That's pretty much it. While riding to church this morning the brakes felt stronger and I think they grabbed a little earlier. Remember that the goal when done is to have no air in the lines, no leaks, and ending up with all new fluid throughout the system. Before going on a test ride straddle the bike and make sure the brakes are firm and have a strong grip.
Then maybe have a brownie, a glass of milk and go for a ride. You might avoid iced tea for a while though.
God's speed.